Note
While we provide Azure portal instructions in this guide, it’s important to be aware that the Azure portal interface may change over time. To ensure you have the most up-to-date information and to navigate any potential changes in the Azure portal interface, we recommend referring to the official Azure portal documentation.
Go to the Azure Portal.
Enter your credentials for the Azure Portal.
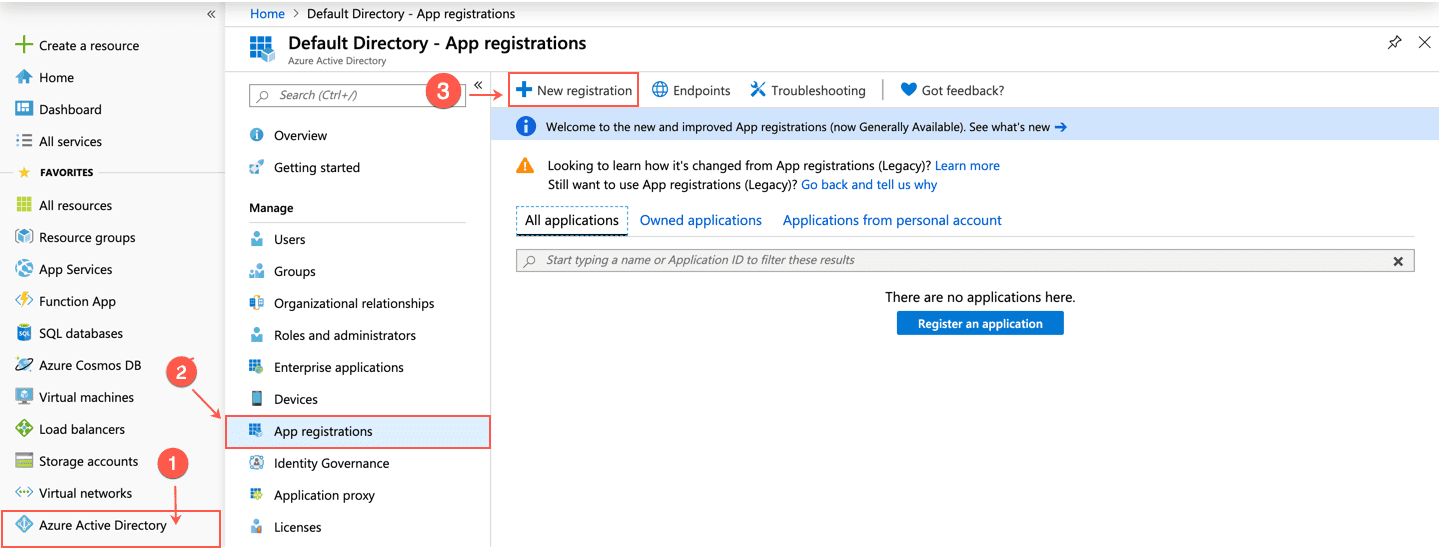
Go to Microsoft Entra ID >> App registrations.
Click New registration.
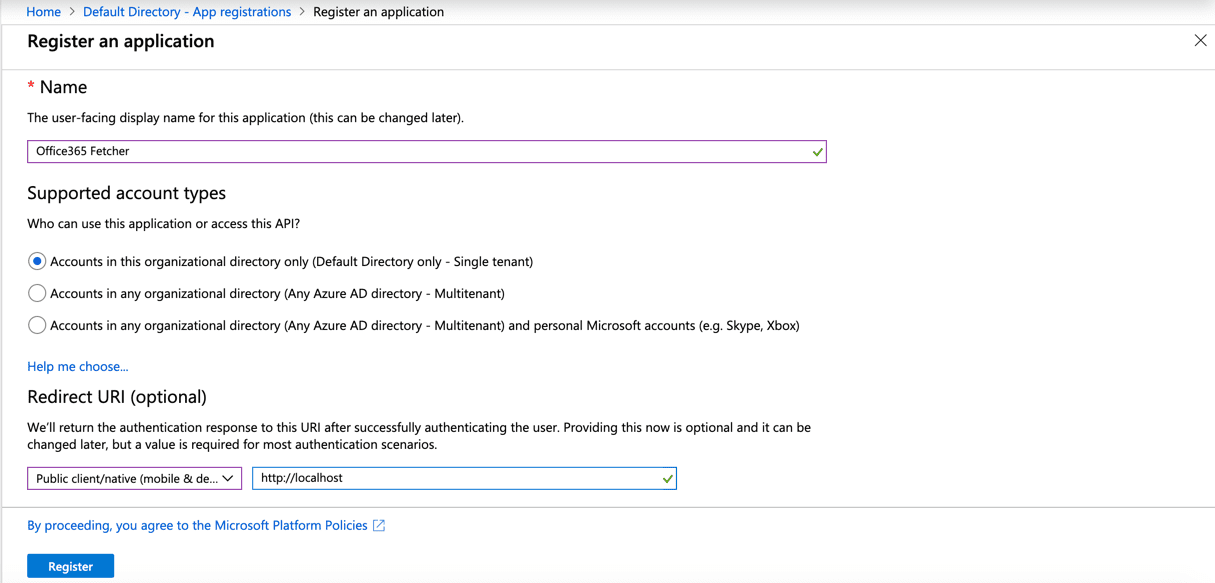
Adding a New Application
Enter a Name.
Select Supported account types.
In the Redirect URI (optional):
7.1 Select Public client (mobile & desktop).
7.2 Enter the following address.
http://localhost
Click Register.
Creating a New Application
Note
You need the Application (client) ID and the Directory (tenant) ID to Configure the Office365 Fetcher in Logpoint.
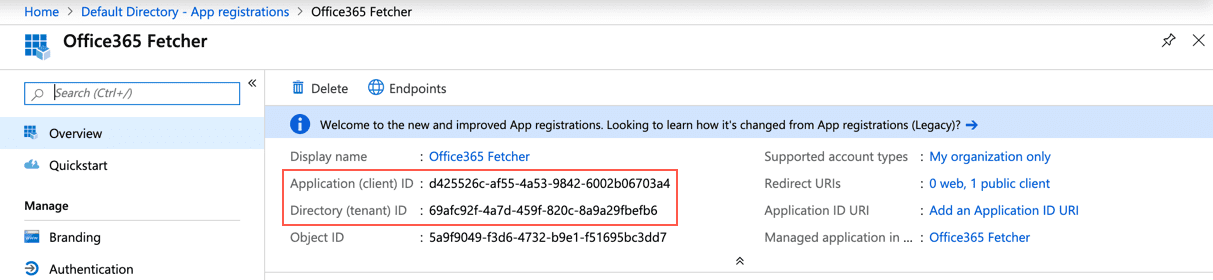
Application ID
Go to API permissions and click Add a permission.
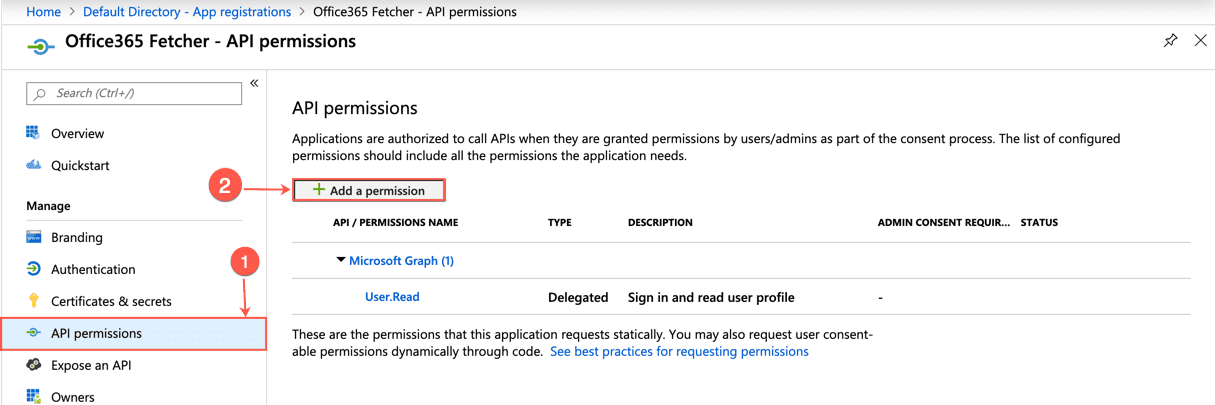
Adding a Permission
Click Microsoft APIs.
Select Office 365 Management APIs.

Selecting Office 365 Management APIs
Click Application permissions.
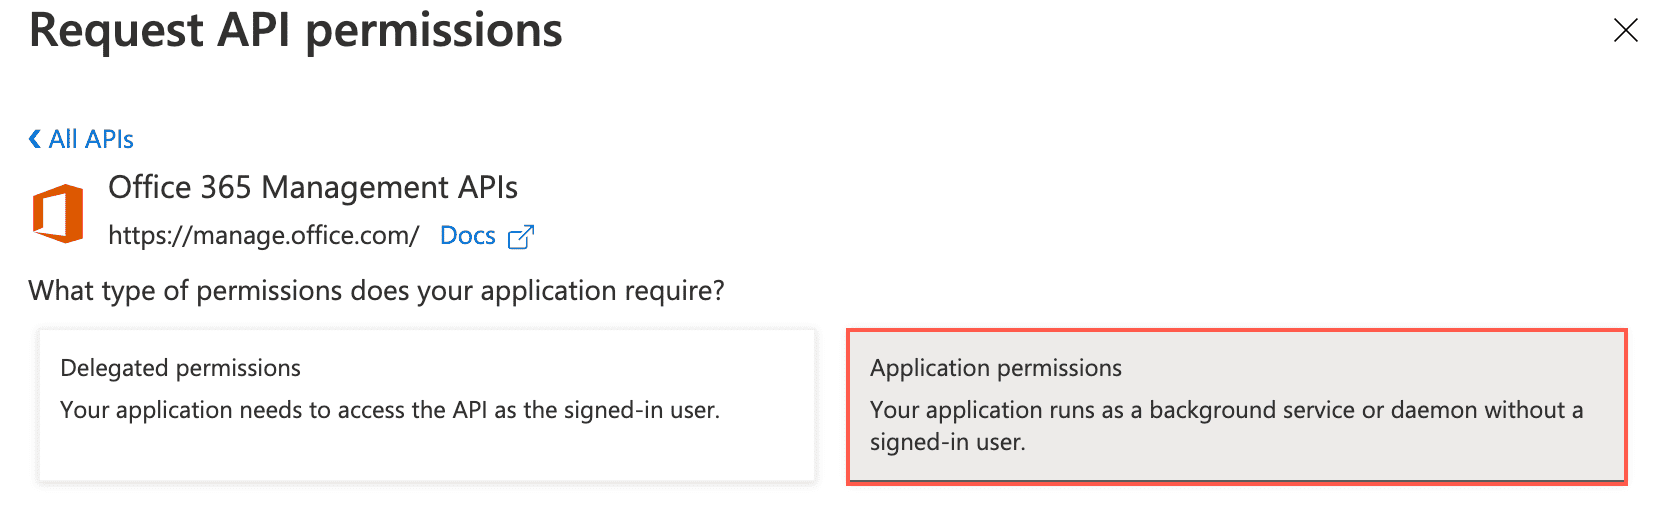
Application Permissions
Select all the available read permissions.
Click Add permissions.
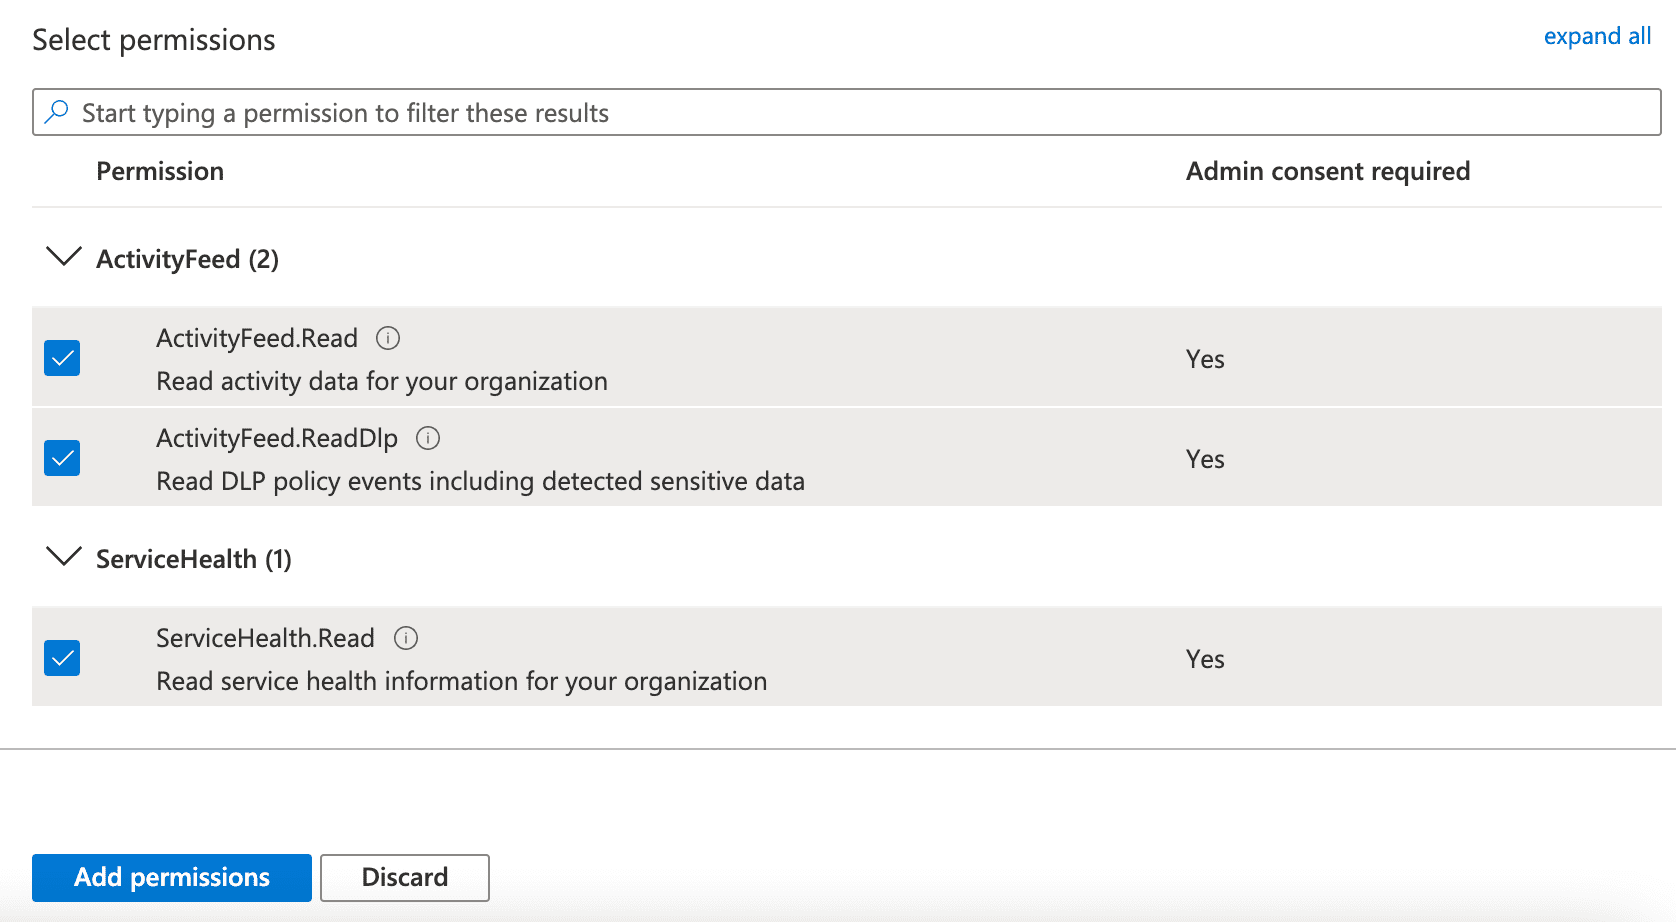
Selecting Read Permissions
Click Grant admin consent for Default Directory.

Granting Admin Consent
Click Yes.

Confirmation Dialog Box
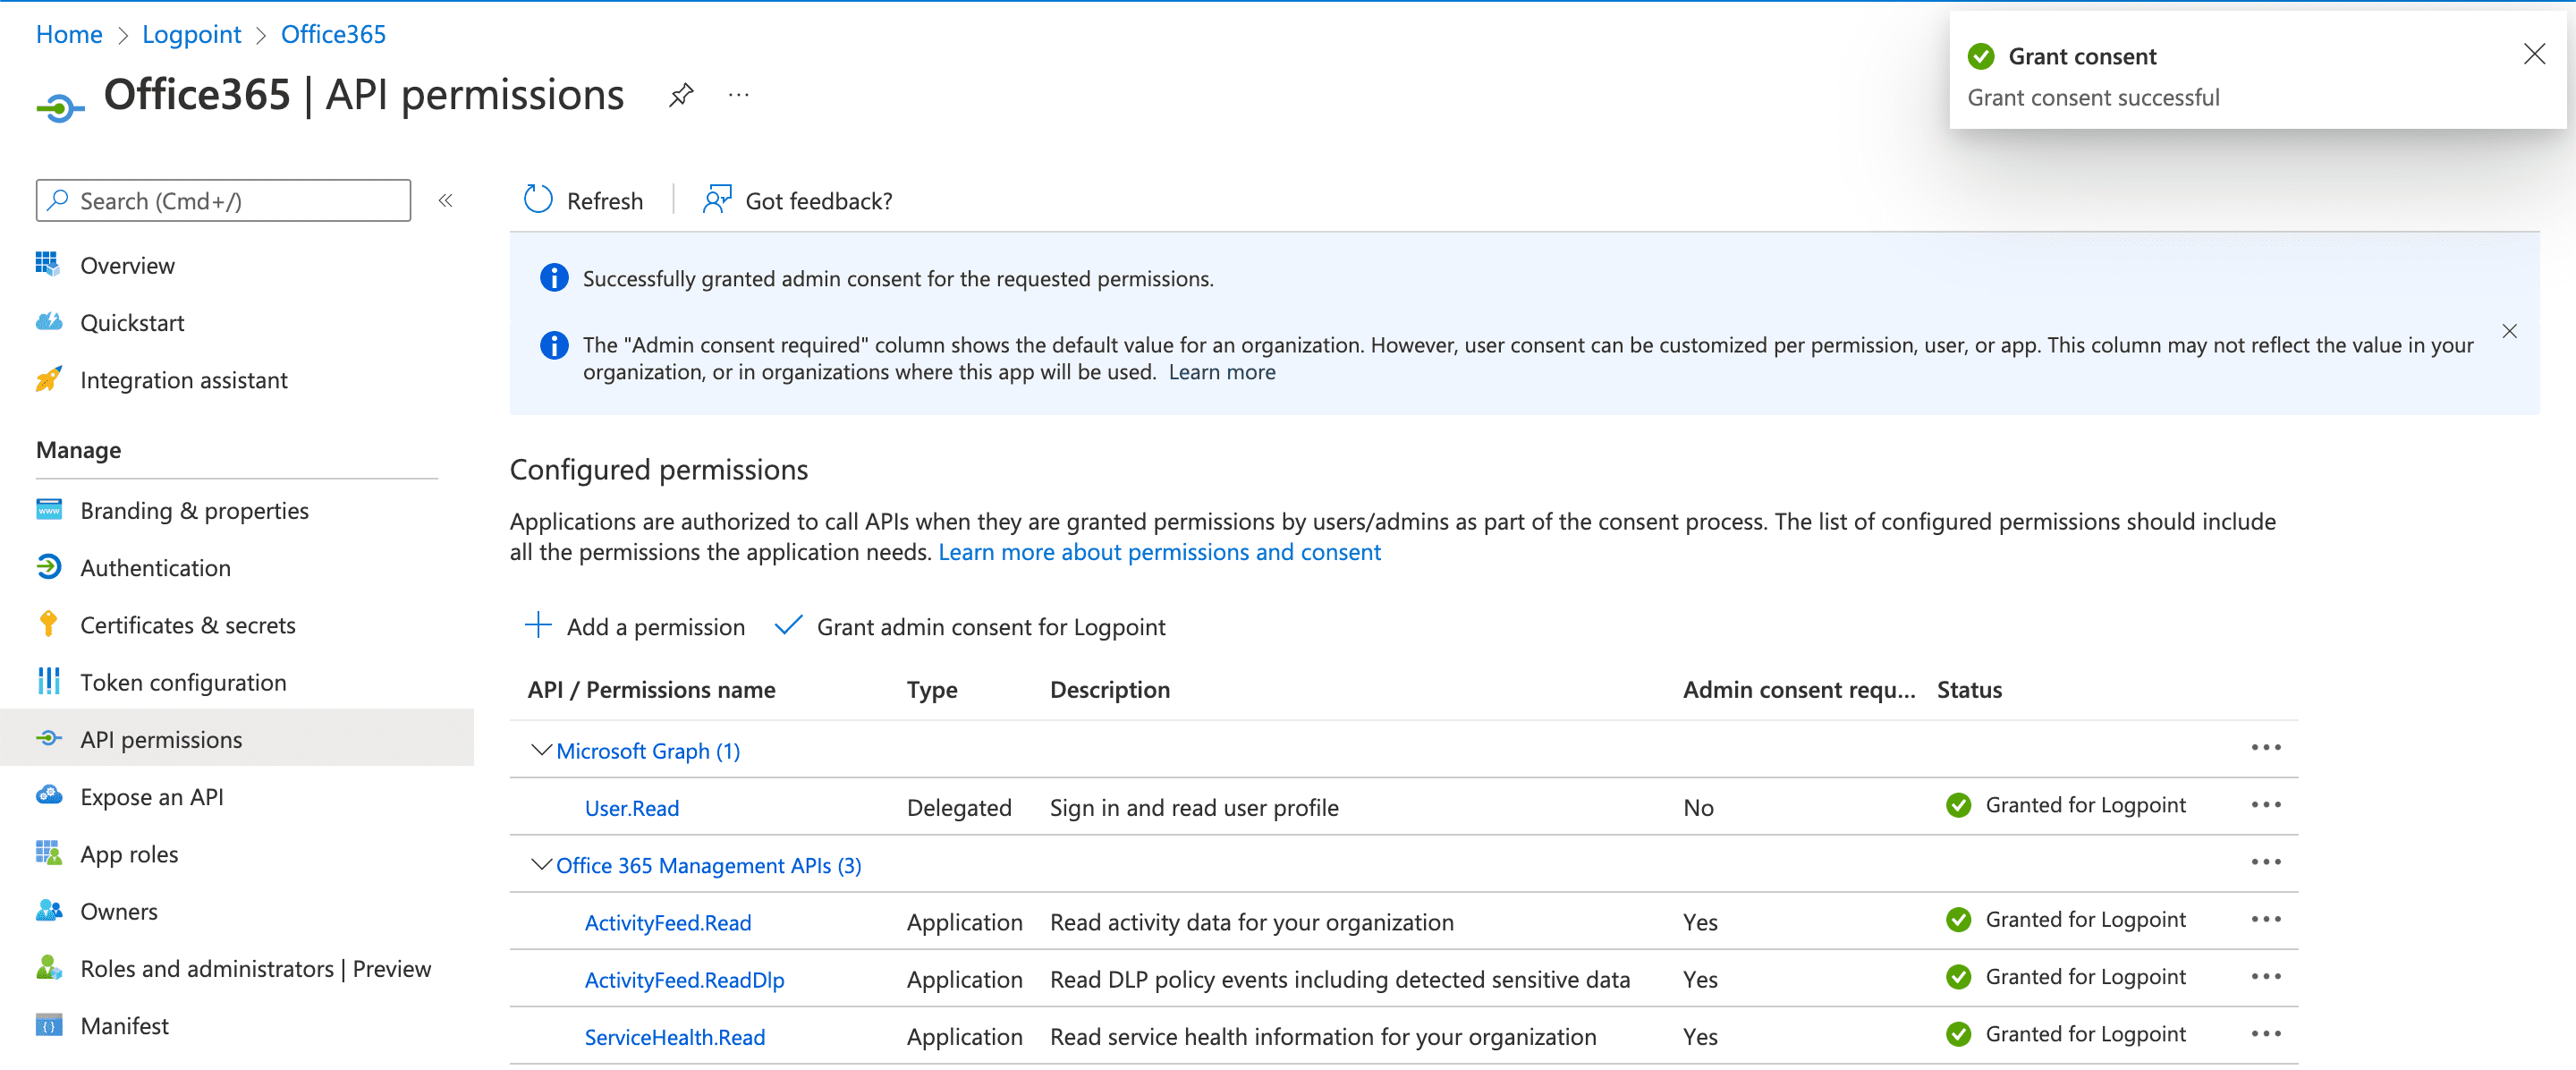
Grant Consent
Go to Authentication.
Enable Allow public client flows to Yes.
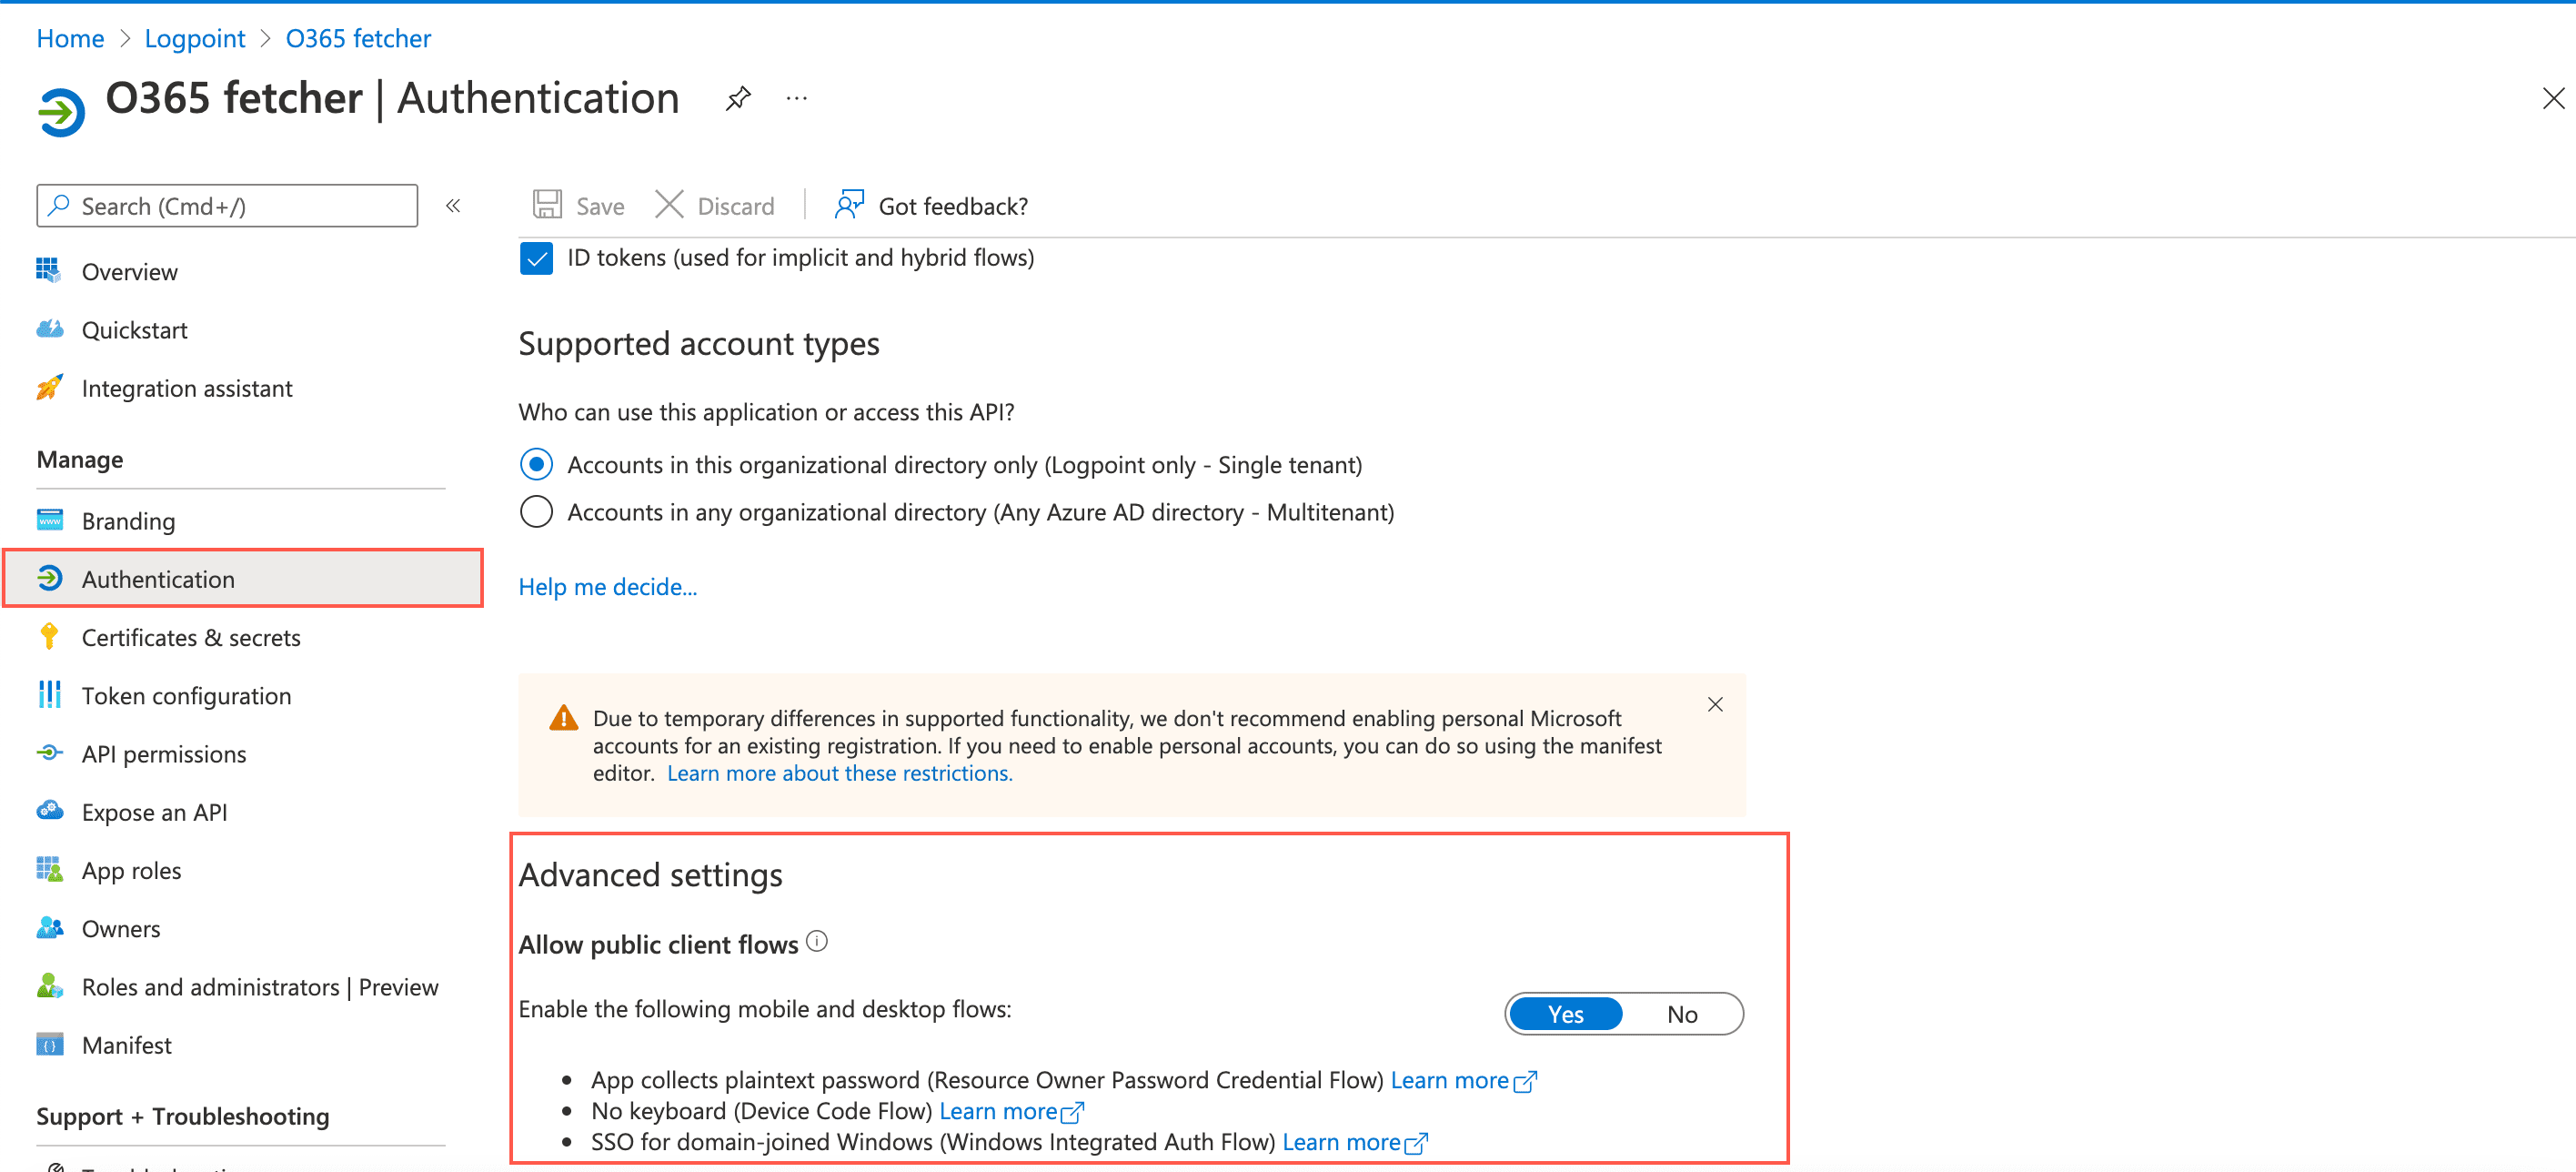
Public Client Flows
Alternatively, you can add the following key to the Manifest in the Azure portal.
"allowPublicClient": true
Click Certifictes & secrets and Client secrets.
Click New client secret.
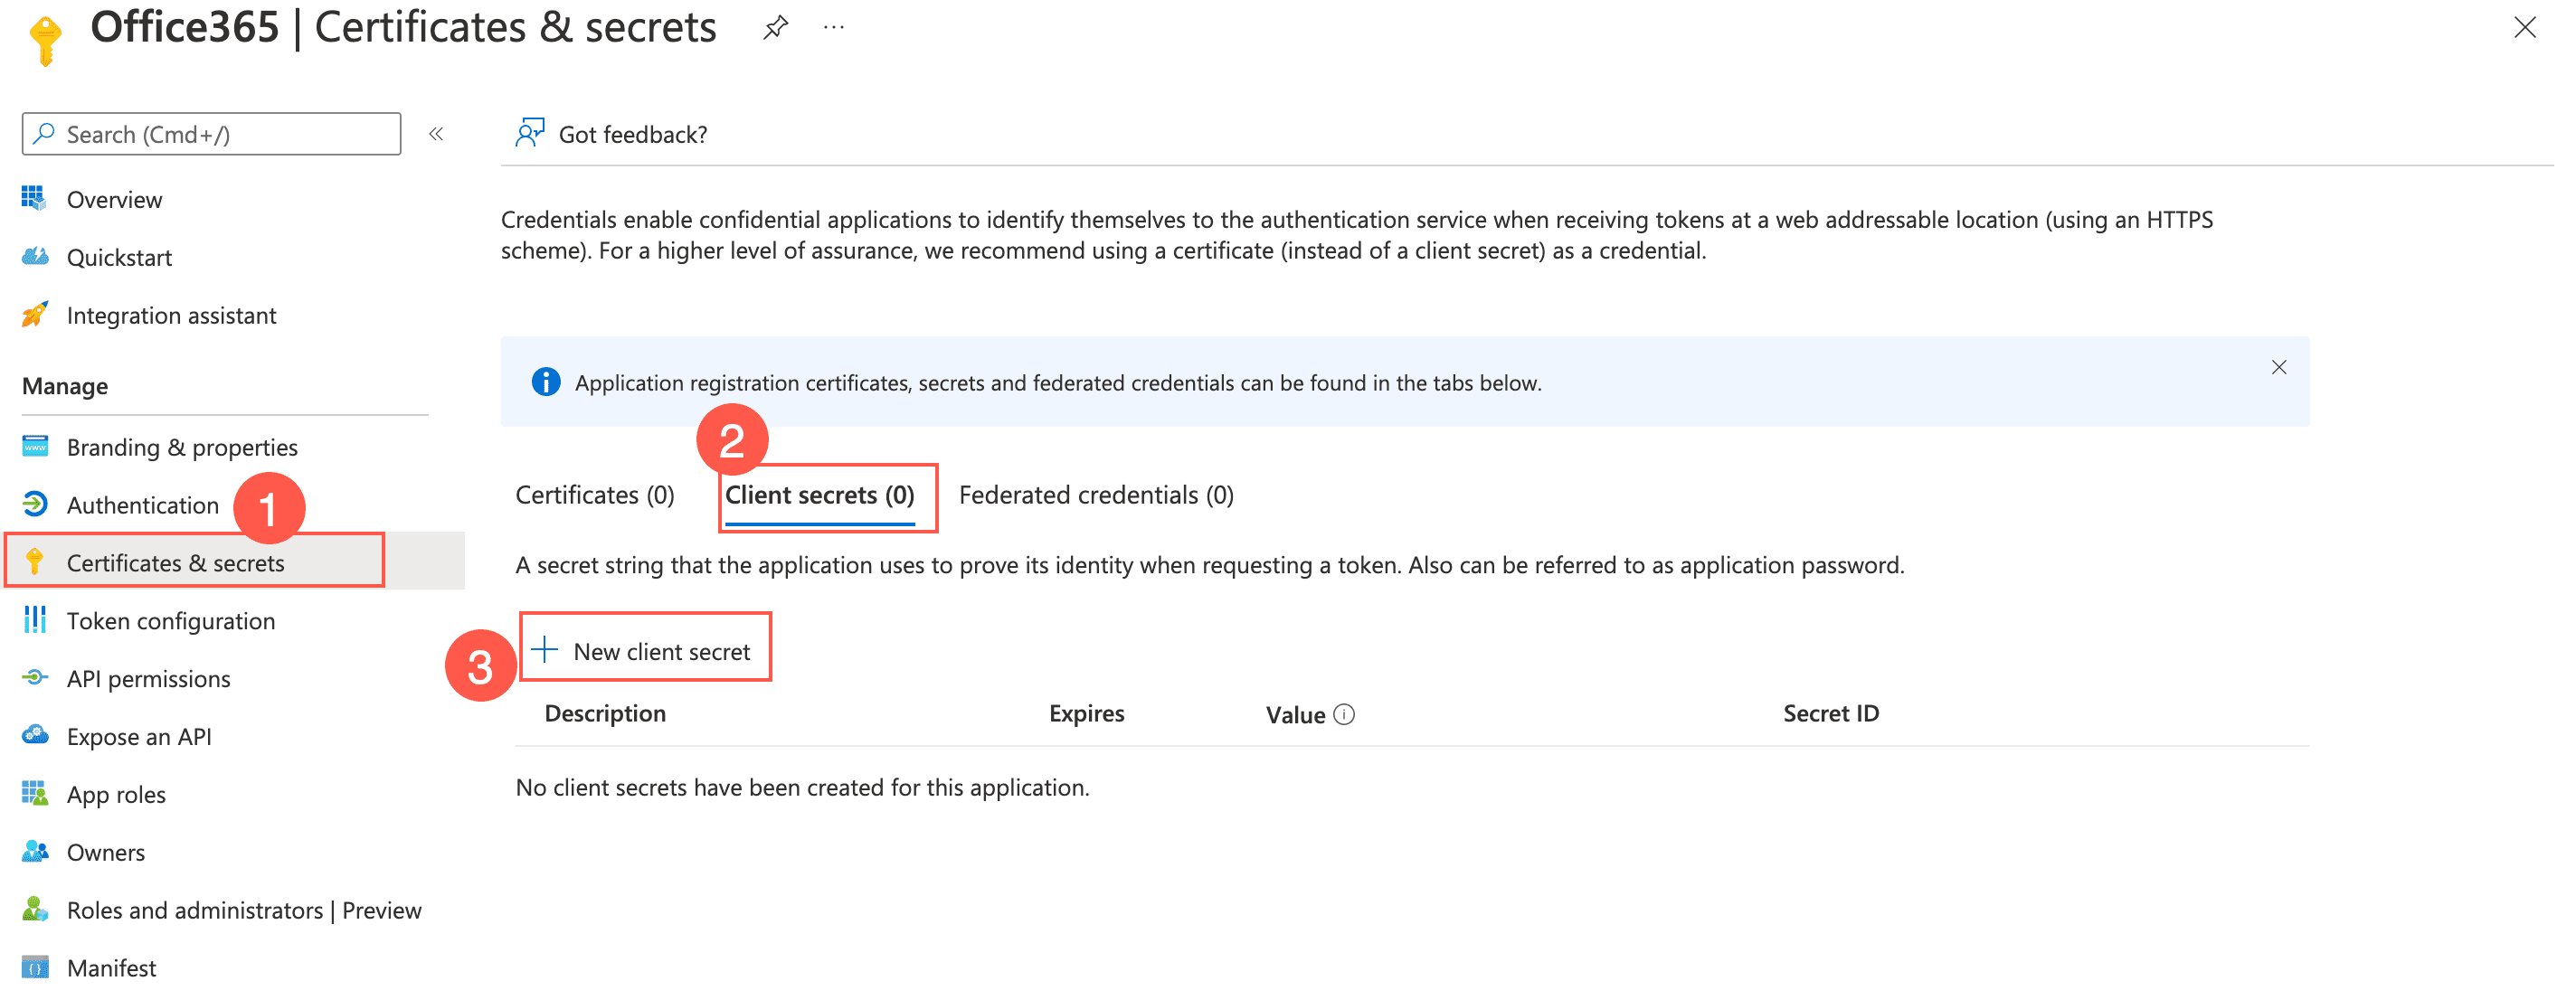
Client Secret
Enter a Description.
Select expiration date for the client secret in the Expires.
Click Add.
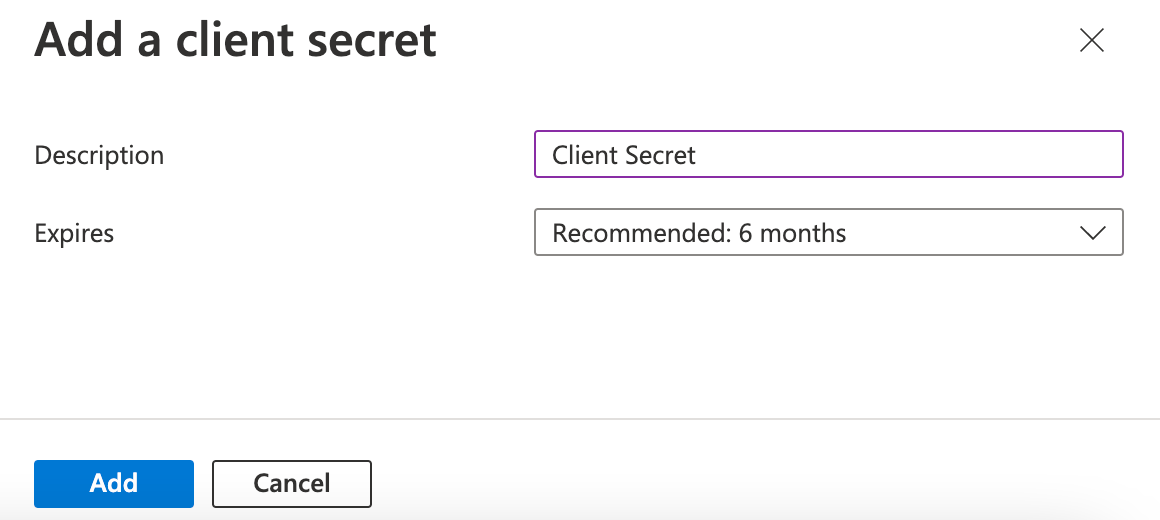
Adding a Client Secret
Run the following commands to generate certificates. The certificates can be generated from any device (Linux server/Windows machine) where OpenSSL is installed. We recommend using Logpoint console via li-admin as OpenSSL is pre-installed in Logpoint.
1.1. To generate a certificate key:
openssl genrsa -out server.pem 20481.2. To create a certificate request:
openssl req -new -key server.pem -out server.csr1.3. To generate certificates:
openssl x509 -req -days 365 -in server.csr -signkey server.pem -out server.crt
Save the certificates generated. You will upload the certificate with the .crt extension to the Azure Portal and use the .pem extension certificate when configuring Office365 in Logpoint.
Click Certificates & secrets on application page in Microsoft Entra ID.
Click Certificates and Upload Certificate.
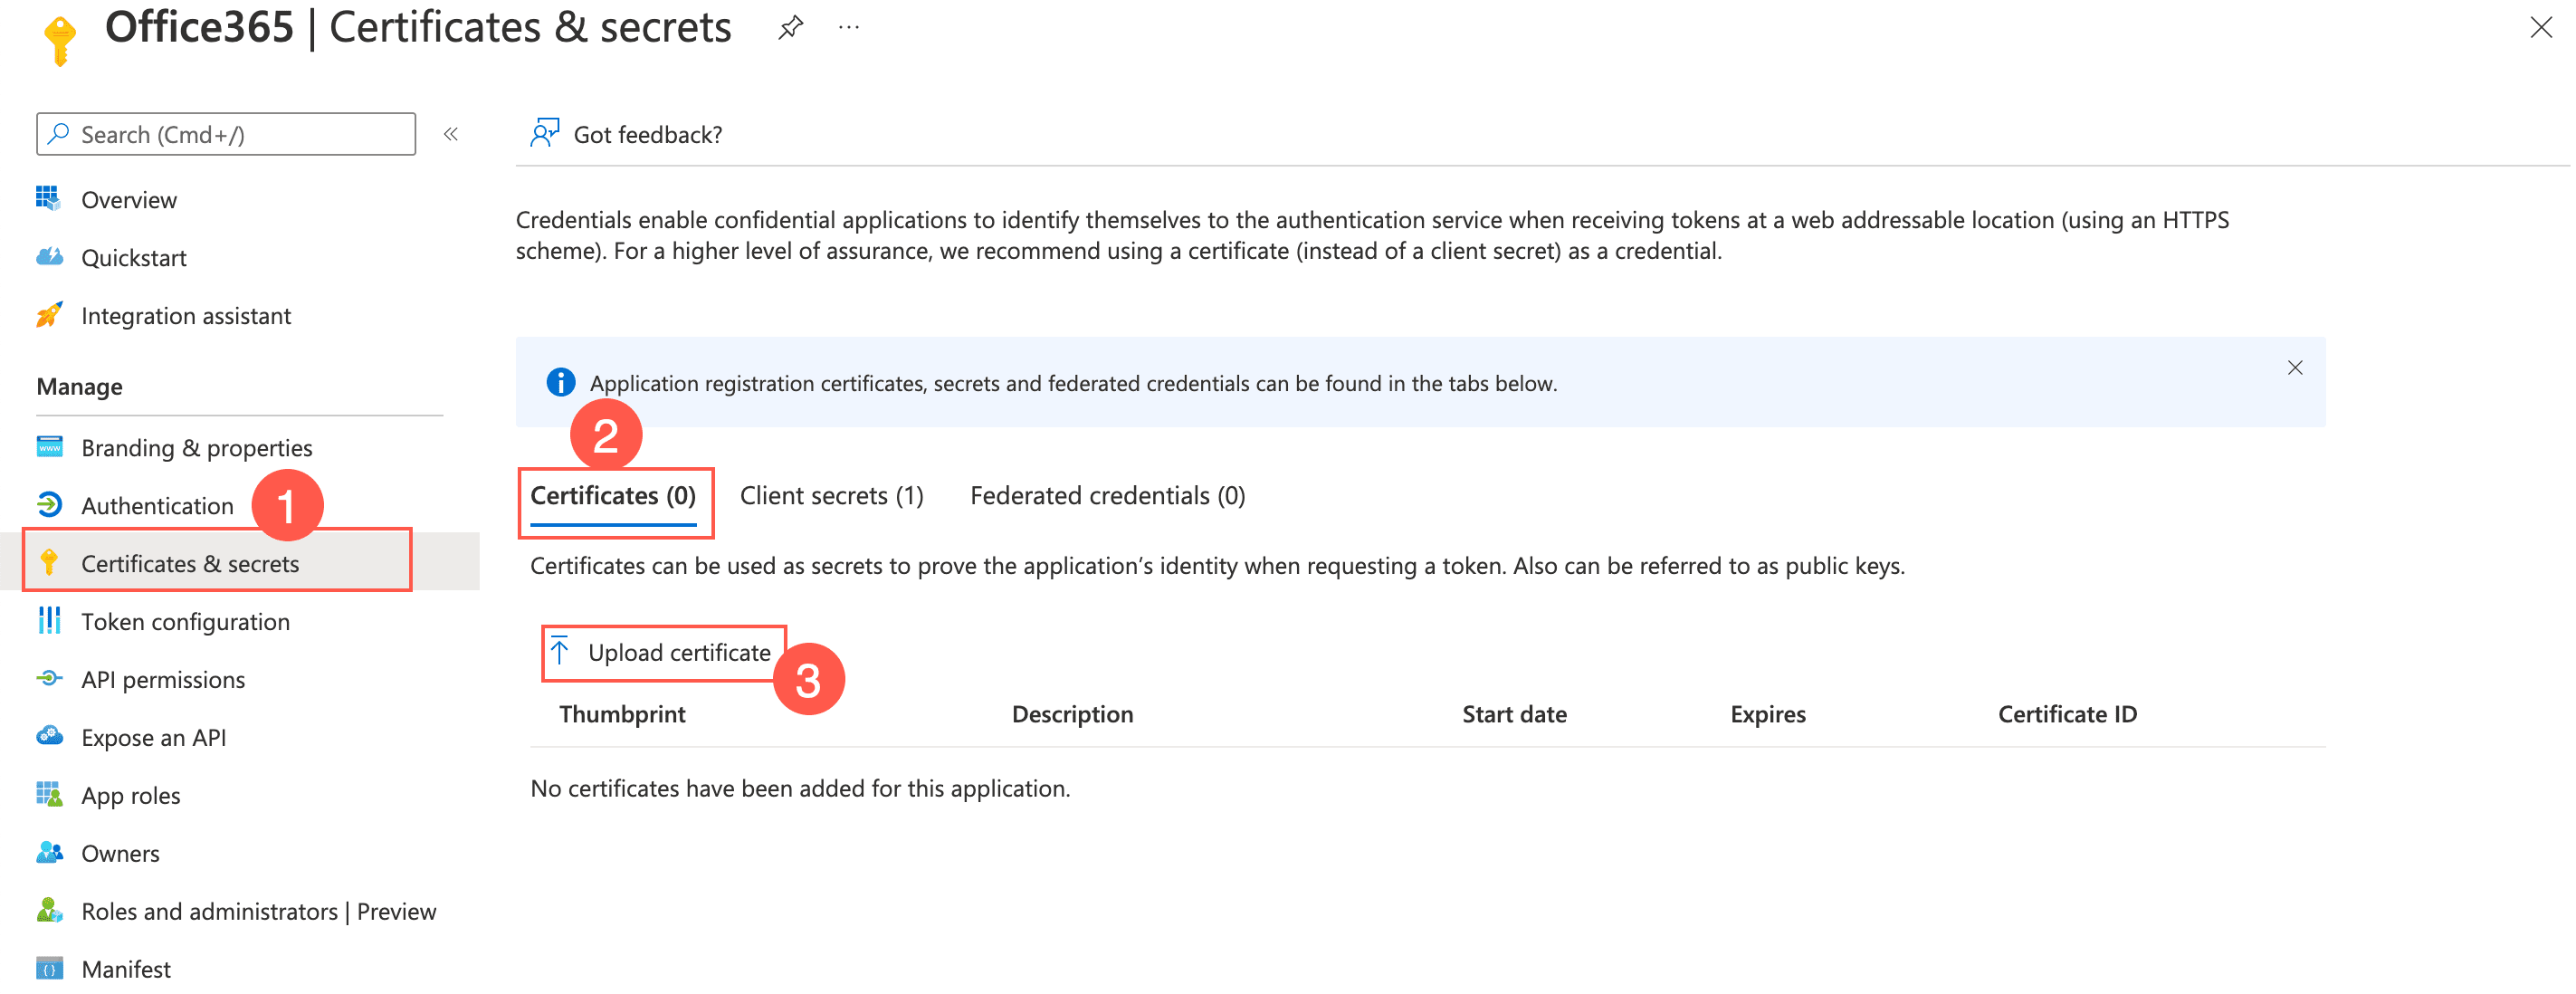
Uploading a Certificate
Select and upload the previously saved certificate with the extension .crt.
Enter a Description for the certificate.
Click Add.
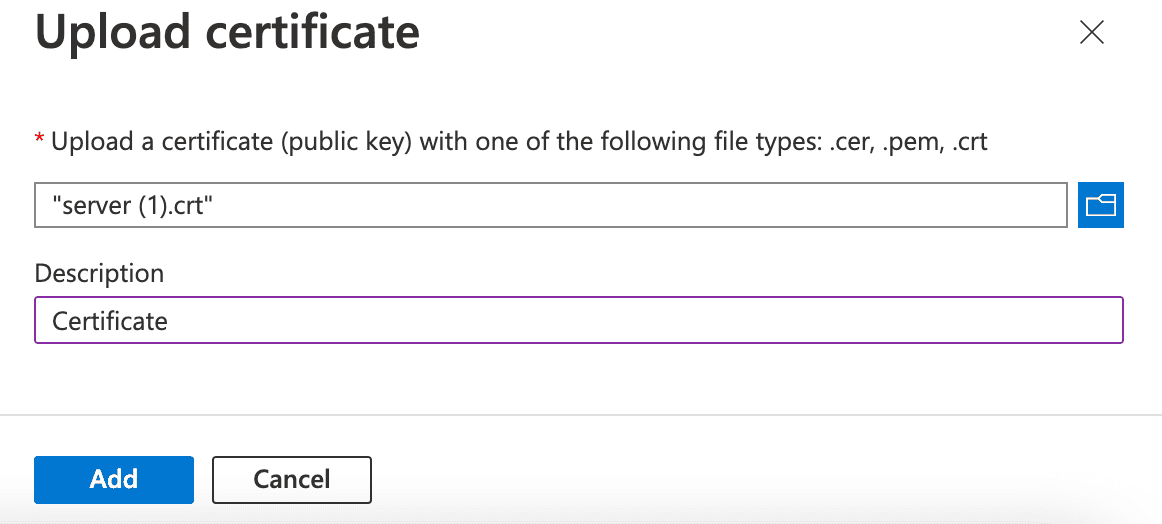
Uploading a Certificate
Note
Note down the Thumbprint of the certificate. You need the value to Configure the Office365 Fetcher in Logpoint.
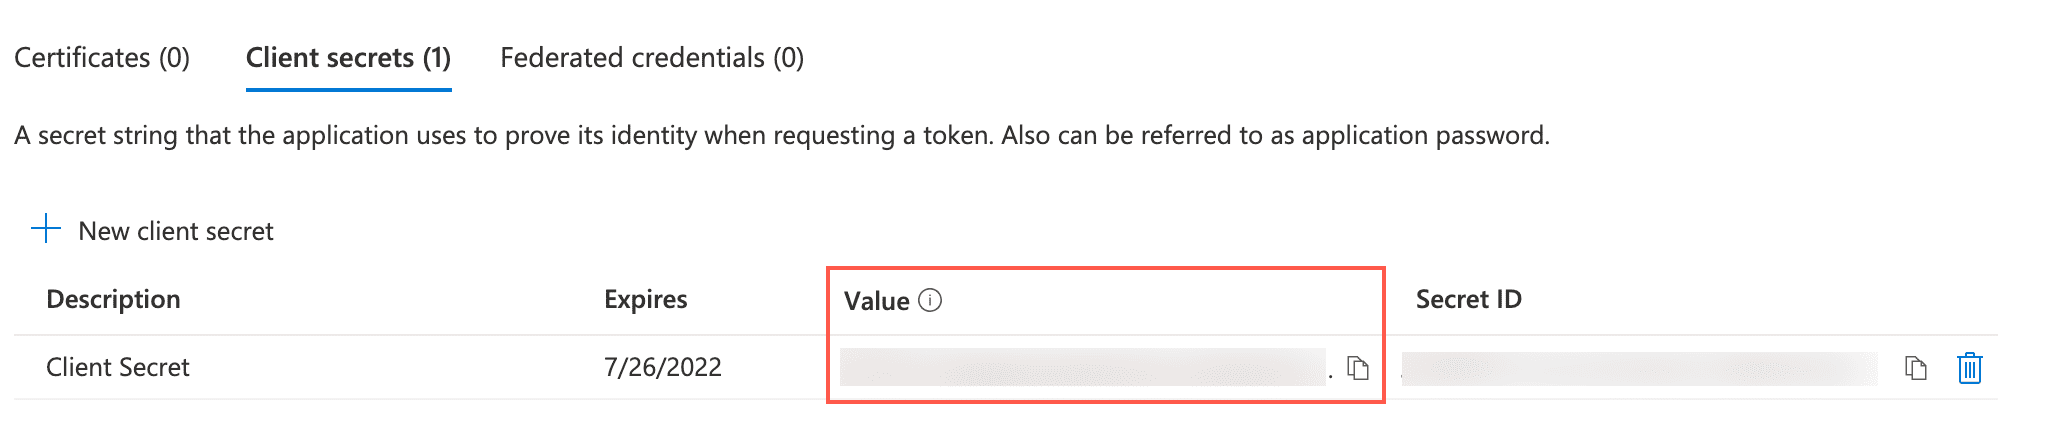
Value of Client Secret
Go to Settings >> Configuration from the navigation bar and click Normalization Policies.
At the top left, click Add.
Enter a Policy Name.
Select the Compiled Normalizers for Office365.
Select the Normalization Packages for Office365.
Click Submit.
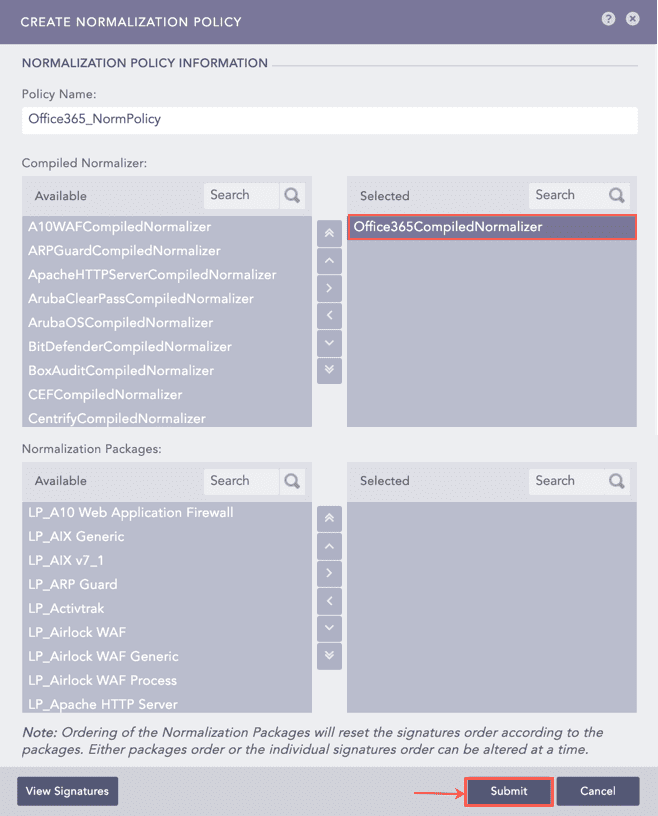
Adding a Normalization Policy
Go to Settings >> Configuration from the navigation bar and click Devices.
Click the Add collectors/fetchers ( ) icon under Actions of the localhost device.
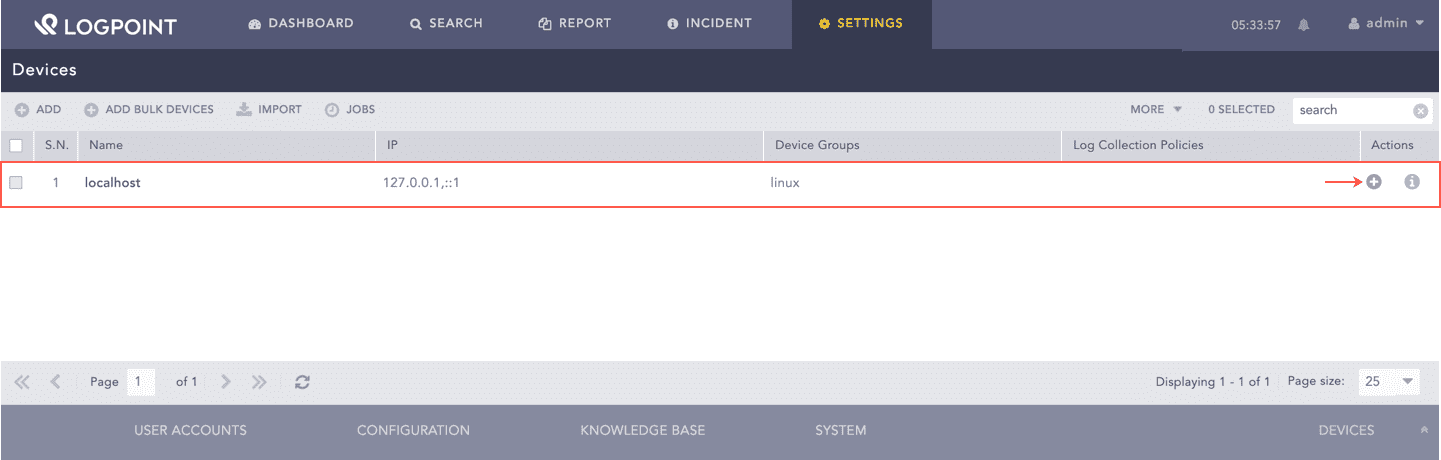
Adding a Fetcher for the Device
Click Office365 Fetcher.

Available Collectors Fetchers Panel
At the top left, click Add.

Office365 Fetcher Panel
Select a mode of Authentication:
5.1. If you select Public Client, enter the Office 365 Username and Password.
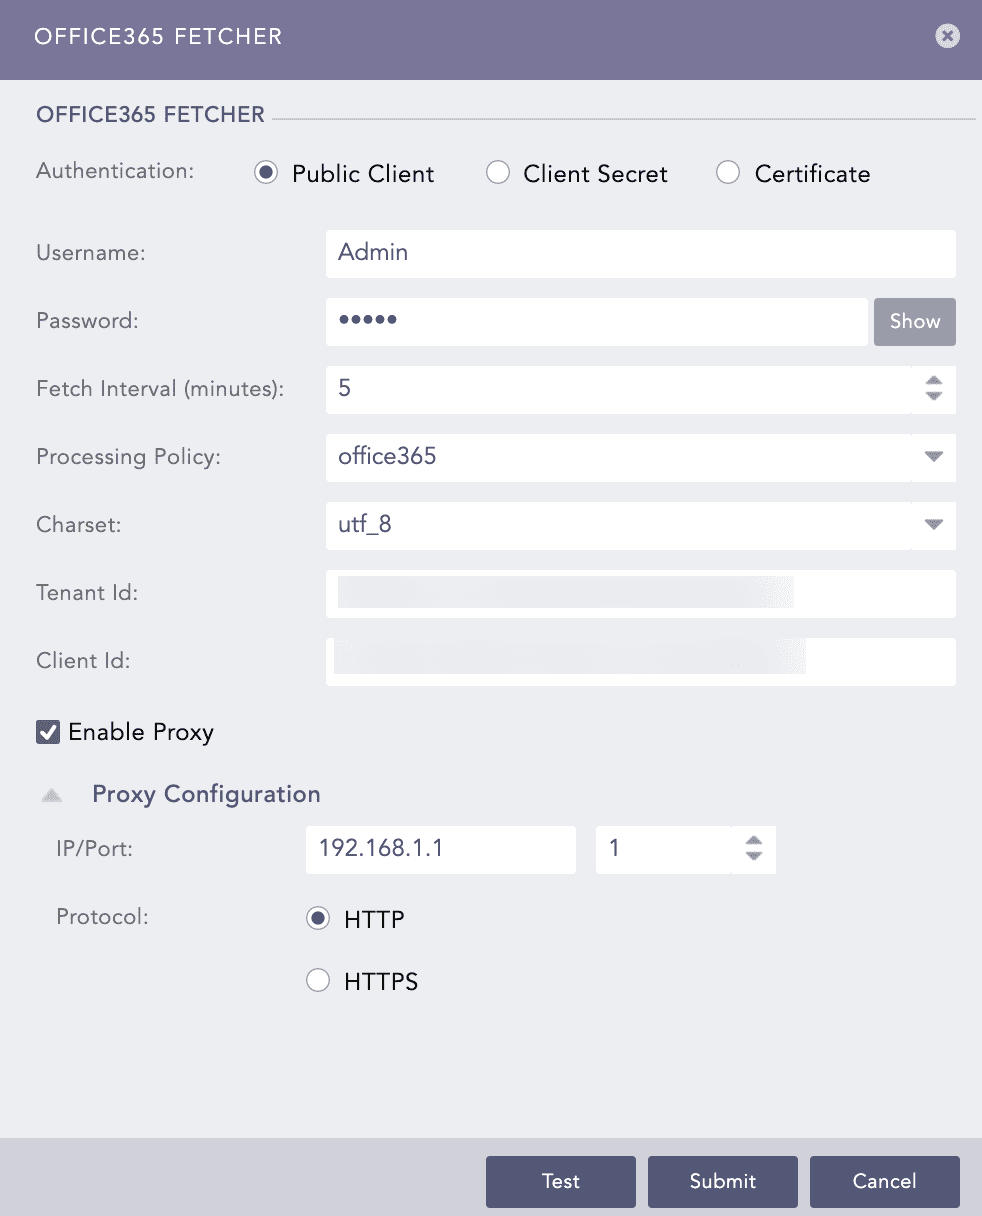
Public Client
5.2. If you select Client Secret, enter the Value of Client Secret in the Client Secret field.
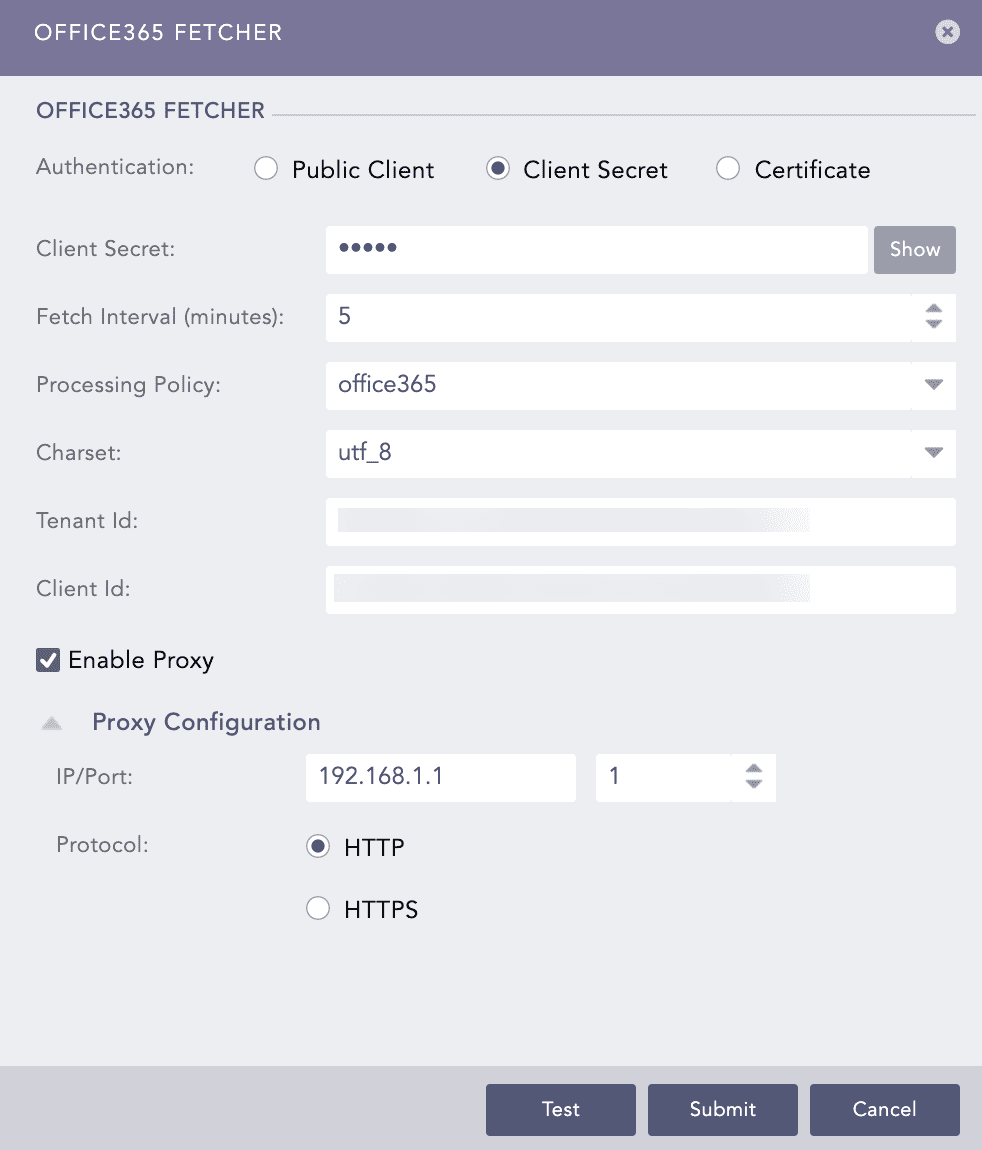
Client Secret
5.3. If you select Certificate,
5.3.1. Enter the Office 365 Certificate Thumbprint in the Certificate Thumbprint field.
5.3.2. Upload the previously saved Certificate with the .pem extension in the Certificate File option.
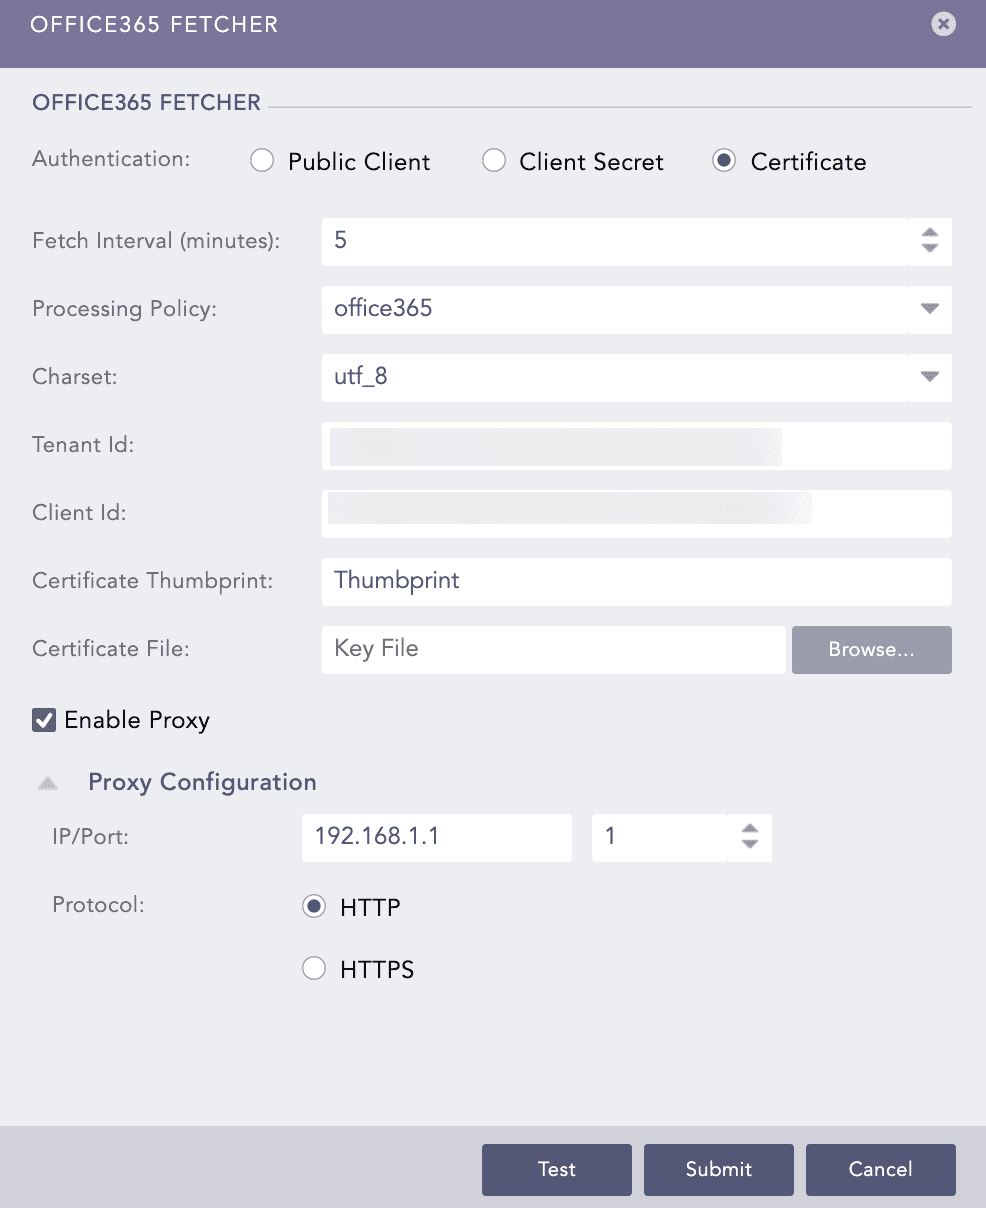
Certificate Thumbnail
Enter the Fetch Interval (minutes).
Select a Processing Policy that uses the previously created normalization policy.
Enter the Directory (tenant) ID in the Tenant ID field.
Enter the Application (client) ID in the Application ID field.
Select Enable Proxy if you use a proxy server.
In the Proxy Configuration:
12.1 Enter the IP Address and the Port number for the proxy server.
12.2 Select HTTP or HTTPS protocol.
Click Test to validate the configuration.
Click Submit.
Note
When you configure and run Office365 for the first time, a subscription is created to different audit log sources in the API. Once set, there is a time gap of 12 to 24 hours before the logs start to come in.